目次
Smile Decoder (DSdecR3)
News! スマイルデコーダ シリーズを2016年4月よりリリースしました。
News! ぬっきぃさんのワンコインデコーダはさらに安いです!(300円~!)\\Nucky's one coin decoder is very cheap! check web nucky!
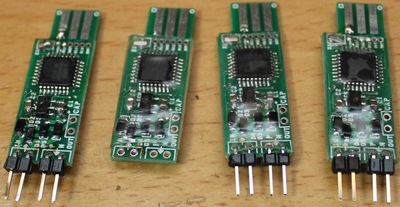
このページでは、DCCデコーダ「スマイルデコーダ」について回路から使用方法、ソフト、販売までが書かれています。 このデコーダはArduinoをベースとしており、完全なオープンソース・オープンハードになっており、様々な方がサウンドデコーダを実装したり、メロディを奏でたり、VVVF音をモーターから出したり、ポイントを動かしたりなどしています。1個あたり材料費で1000円弱でZゲージにも(ギリギリ)入るDCCデコーダを作成できます。
This page describes our original DCC decoder “Smile Decoder”. This decoder has a compatibility with Arduino. You can easily customize this decoder. This decoder supports turnouts and locomotive, specialized feature.
index / 目次
- Smile Writer / スマイルライター (Programmer for smile decoder)
- Sound Option 簡易サウンド機能追加方法
- Smile decoder ノウハウ集 (Soldering instruction)
- Decoder development board デコーダ開発ボード
Parts list / 部品表
| Parts No | Parts | Package | url | Parts ID | Price |
|---|---|---|---|---|---|
| D1-D5 | Rohm RB160M-30TR, 1A Panjit SS2040FL | SOD-123 | url url | I-01398 I-02073 | @15JPY |
| C1,C2,C3 | 1uF 25V or 50V MLCC, | 2012size | url | P-07525 | @10JPY |
| C4,C5 | Option, 1uF 25V or 50V MLCC, | 2012size | url | P-07525 | @10JPY |
| R1,R2 | 100kOhm, | 1608size | url | R-06104 | @0.05JPY |
| IC1 | ATMEL ATMEGA328P-AU, | QFP32 | url | I-04386 | @280JPY |
| IC2 | Rohm BD6231F-E2 | SOP8 | url | I-05088 | @180JPY |
| IC3 | Toshiba TA78L05F, | SOT-89 | url | I-00494 | @25JPY |
| X1 | Murata Ceralock 16MHz,CSTCE16M0V53 | 3 pins, SMD | url | P-09679 | @40JPY |
| - | SmiTube 10mm | url | P-08986 | - |
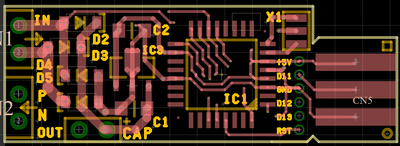
Schematics
Features 特徴
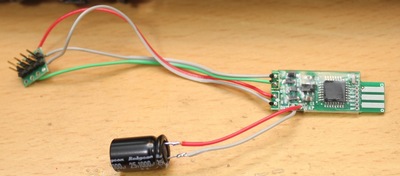
- Very small size (30 x 12.5mm)
小型サイズ - keep alive capacitor is available to add.
コンデンサ追加端子あり。瞬断に強い。 - Arduino based software, open source. You can use Arduino IDE to program.
Arduinoベース。ソフト書き換え可能。オープンソース。 - Easy to program. Card edge connector is available. Program Writer is very cheap!
カードエッジコネクタ搭載で書き換えが簡単。 - Locomotive and turnouts, sound and melody functions are supported.
機関車やポイント、サウンドにヘッドライトやファンクションのデコーダを同一のボードでソフト書き換えにより実現。
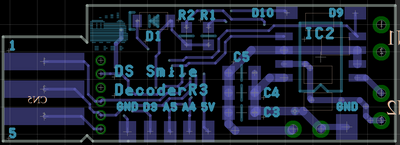
Pin Assignment
| Pin No. | Function | Notes |
|---|---|---|
| D3 | Sound, PWM, generic use | We often use for sound option. |
| A5, A4 | I2C, Analog input pins | |
| D9, D10 | Motor PWM pins | If not soldered Motor Driver, you can use this pin freely. |
| IN | DCC input pins. | Connect to rail side wire. |
| OUT | Motor output pins. | Connect to motor side wire. |
| CAP | Keep alive capacitor pins. | DO NOT MISUNDERSTAND plus(+) pin. See + mark. |
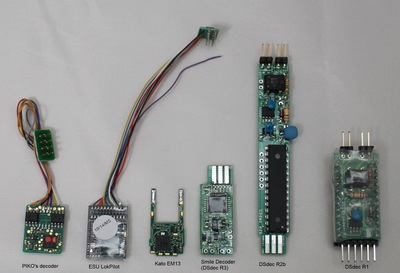
Decoder Comparison
Download (sketches)
以下は、Arduino IDE用のポイントと機関車デコーダ等のソースコード(スケッチ)例や、DCCデコーダ機能のベースとなるNMRA DCCライブラリの転載(ミラー)です。
This decoder sketches are based on NMRA DCC library. Please install the library before use.
| File | Version | url | Notes |
|---|---|---|---|
| Locomotive decoder sketch (車両用デコーダスケッチ) | R4 | download | Improve maximum speed stop problem. |
| Locomotive decoder VVVF sketch (VVVF音対応車両用デコーダスケッチ) | K7(2015/6/15) | download | Improved by Fujigaya-san. Required TimerOne Library. Detail description is here (written in Japanse) |
| Locomotive decoder with VVVF and melody sketch | K9(2015/8/1) | download | produced by Fujigaya-san. Required TimerOne Library and PWMDAC_Synth. Detail description is here (written in Japanse) |
| Turnout decoder sketch (ポイント用スケッチ) | R1 | download | first version |
| Headlight decoder sketch (ヘッドライト用スケッチ) | R1 | download | first version |
| NMRA DCC Library 2014-10-15 (共通ライブラリ) | R1 | download | このライブラリは必ずArduino IDEのlibrariesフォルダにインストールしてください。Mirror from mrrwa.org |
サウンド関連スケッチはSound Optionを参照ください。
Sound related sketches are described in Sound Option
Programming using Arduino IDE
If first time setup(Smile Writer / スマイルライター) is finished, please see the following instruction.
スマイルライタの作成作業(Smile Writer / スマイルライター)を完了した後に、以下の手順でスケッチをスマイルデコーダに書き込みます。
- Run Arduino IDE.
Arduino IDEを起動します。 - Select the board as Arduino UNO.
マイコンボードはArduino/Geuino UNOを選びます。 - Check serial port.
スマイルライタが装着されているシリアルポートを確認し選択します。 - Select programmer as “Arduino as ISP”.
書き込み装置を「Arduino ISP」にします。 - Open your decoder sketch or examples.
書き込みたいスケッチを開きます。 - Burn the bootloader at tool menu.
Note: 1st time may fail to program a bootloader. Please retry.
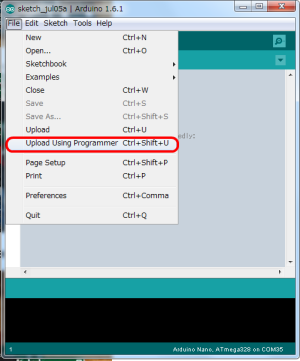
ツールメニューからブートローダを書き込みます。なお、一回目は失敗する場合があります。失敗した場合はもう一度、書き込み操作をしてください。 - Click “Upload using programmer” at the file menu. DO NOT USE upload button and upload menu.
「書き込み装置を使って書き込む]を押して、スケッチを書き込みます。なお、「アップロード」ボタンは絶対に使用しないでください。スマイルライタのArduino ISPスケッチが書き換えられてしまいます。 - No error happens, that's all!
エラーが発生していなければ成功です。
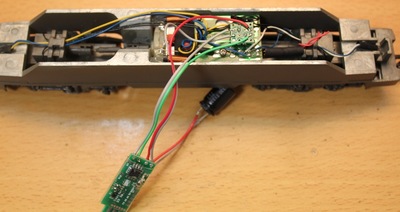
Implementing to locomotive and turnouts
This chapter describes how to implement the decoder to turnouts and locomotive.
ここでは、ポイントと車両にデコーダを組み込んだ例をお見せします。
Turnouts
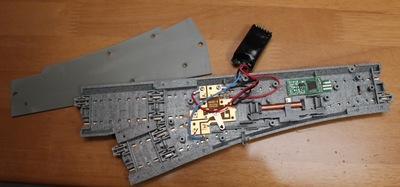
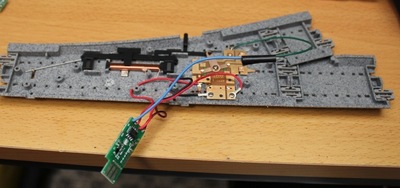
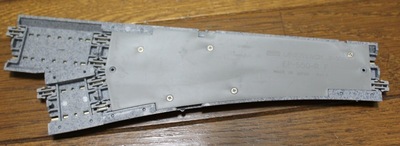
I use Kato 2-301 HO turnout with solenoid. This turnout doesn't support DCC. Then I implement smile decoder to this turnout internal.
Locomotive
Download (PCB layouts, etc.)
CV設定方法
以下に、主なスケッチの初期設定(主にCV)の方法を記載しています。
Accessory(Turnout) decoder / アクセサリデコーダの場合
CV1(LSB)とCV9(MSB)がアドレス設定用です。
CV1(LSB) and CV9(MSB) means turnout address value.
CV9は0、CV1を1とすると、初期値(アクセサリアドレス1)となります。CV1に10と書き込むと、アクセサリアドレスは10になります。CV9は上位ビットをあらわすので、255超の場合はCV9に上位ビット分を書き込んでください。
If CV9 sets 0 and CV1 sets 1, turnout address means 1. If you want to set the address 255 or more, you need to write CV9 the upper bit value.
Distribution / 頒布
不定期に頒布中。以下の価格は参考価格で、部品調達状況により常に変動します。 また、デコーダキットについては頒布価格を下げるため秋月電子で購入出来る部品は頒布しませんので、ご了承下さい。お手数ですが、各自で入手下さい。
- デコーダ開発ボード 3000円
- スマイルライターキット 1000円
- デコーダキット 1000円(基板10枚くらい、1608サイズ100kΩ抵抗必要個数分のセット。残りは秋月電子で買ってください)
- 基板大量購入 要問い合わせ
- 送料 200円
お問い合せ・購入は、公式オンラインショップの注文フォームの備考欄か、メールでどうぞ。

※完成品はありません。全て自分でハンダ付け&ソフト書き込み願います。
