How to prepare for AnalogDC
- Preparation to assemble
- Hardwares setting.
- Configuration for Motor Shield
- Procudure to prepare softwares
Preparation to assemble
You need below hardwares to run Desktop Station.
- Arduino board(duemilanove328 or UNO R3 or compatible one, for example Arduino UNO R3, Akiduki's AT-MEGA board)
- Motor Shield (DF-Robot, Genuie.
- USB cable (suitable with your arduino board)
- Windows xp, Vista, 7 or 8 PC. Please install .NET Framework 2.0 runtime package if not installed.
- 9-12VDC Power supply for Arduino.
- Supply cable to connect to rail
You need below softwares to run Desktop Station. You can get these softwares free of charge.
- Arduino IDE (including usb serial driver)
- Desktop Station and Analog_RSx.ino
- If not installed, .NET Framework 2.0 runtime package
Hardwares setting.
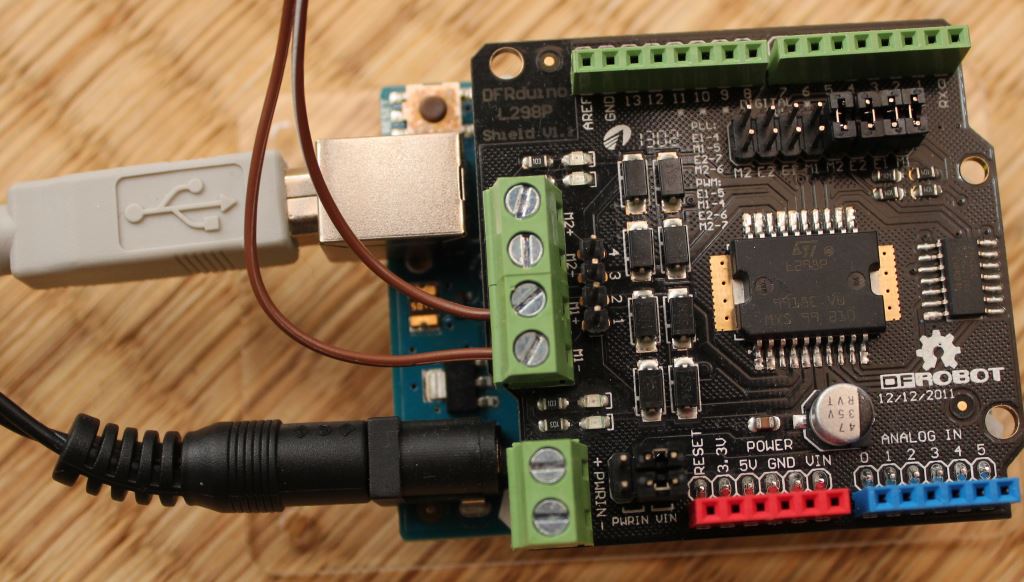
Very easy. Connect Motor shield and Arduino. Set jumper pins as PWM mode.
DF-ROBOT's compatible Motor Shield is settled as below.
Configuration for Motor Shield
You have to edit motor assigned pins of "AnalogRSx.ino" depending on your Motor Shield.
Table: Assignment table of Digital pins for Motor Shield.
| DF-Robot | Arduino Genuie | Note | |
| Motor1 PWM | D5 | D3 | Edit MOTOR1_PWM. |
| Motor1 Direction | D4 | D12 | Edit MOTOR1_DIR. |
| Motor1 Break | not assigned | D9 | Edit MOTOR1_BRK. |
| Motor2 PWM | D6 | D11 | Edit MOTOR2_PWM. |
| Motor2 Direction | D7 | D13 | Edit MOTOR2_DIR. |
| Motor2 Break | not assigned | D8 | Edit MOTOR2_BRK |
Procedure to prepare softwares
- Download the latest Desktop Station.
Also download Railuino. - Download Arduino IDE 1.0.x. Unzip them to your computer.
- Plug USB connector of your Arduino board to USB port on your computer
- If you plug Arduino board first time, install serial driver software. Serial driver software is included Arduino IDE files. See also arduino.cc
- Install Desktop Station to your computer. Unzip a Desktop Station ZIP file.
- Compile and Write included AnalogDC Gateway "Analog_RSx.ino" to Arduino board using Arduino IDE. You can download AnalogDC GATEWAY sketch named "Analog_RSx.ino" in this site. Desktop Station works with this sketch. See also how to upload.
- Upload compiled Analog_RSx.ino to your arduino.
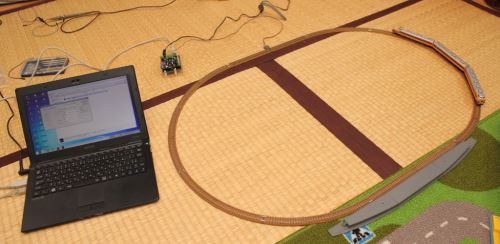
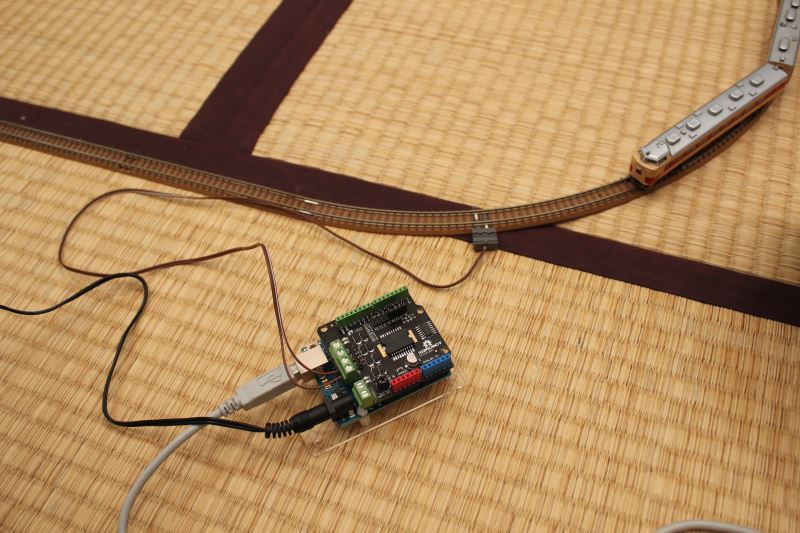
- Connect rail and Motor Shield shield and your PC.
- Select MM2 and address 1 or 2 at locomotive configuration. The address assigns as Output 1 or 2.