How to make DS-main R4
Introduction
DS main is an digital model train controller. This hardware includes the feature of DCC/MM2 shield and Arduino, S88 shield.
How to connect PC
- Download CH340G driver software.You can download it at this download page.
- Unzip it.
- Connect DSmain to PC. Probably automatic plug and play fails. Please use manual install. Select unknown CH340 device and install the CH340G driver.
- If you need to select the driver path, set unzipped path.
- Click next button and DS main will be recognized by your PC. Then you need to remember serial port number(COMxx).
- Run Desktop Station and open config window. You need to set serial port number and baudrate as 115200. Then check "Use Leonardo(DTR)".
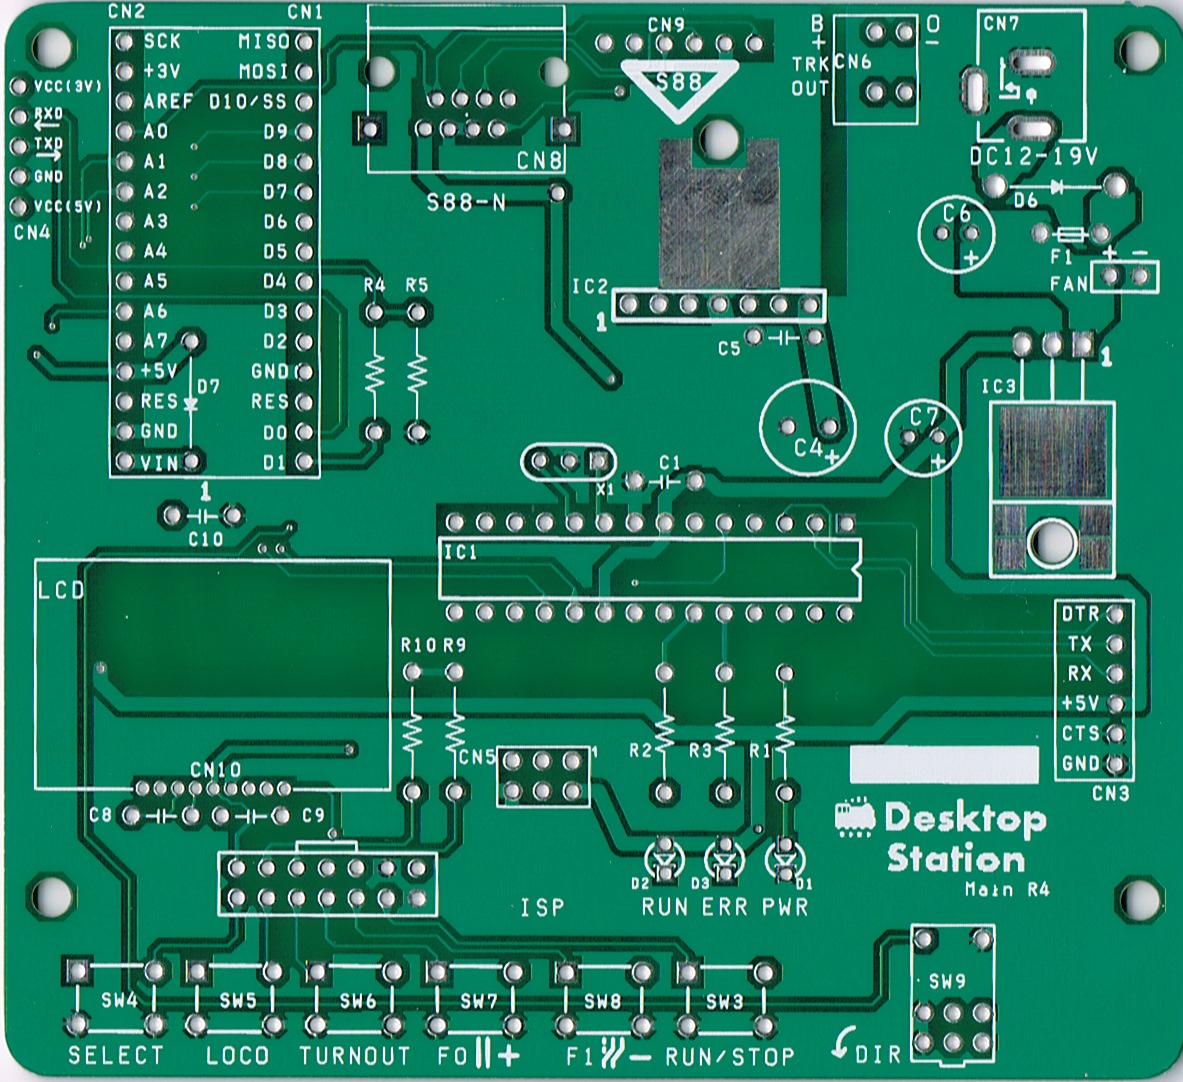
Example of soldered PCB
The followings are soldered photos. Please refer.

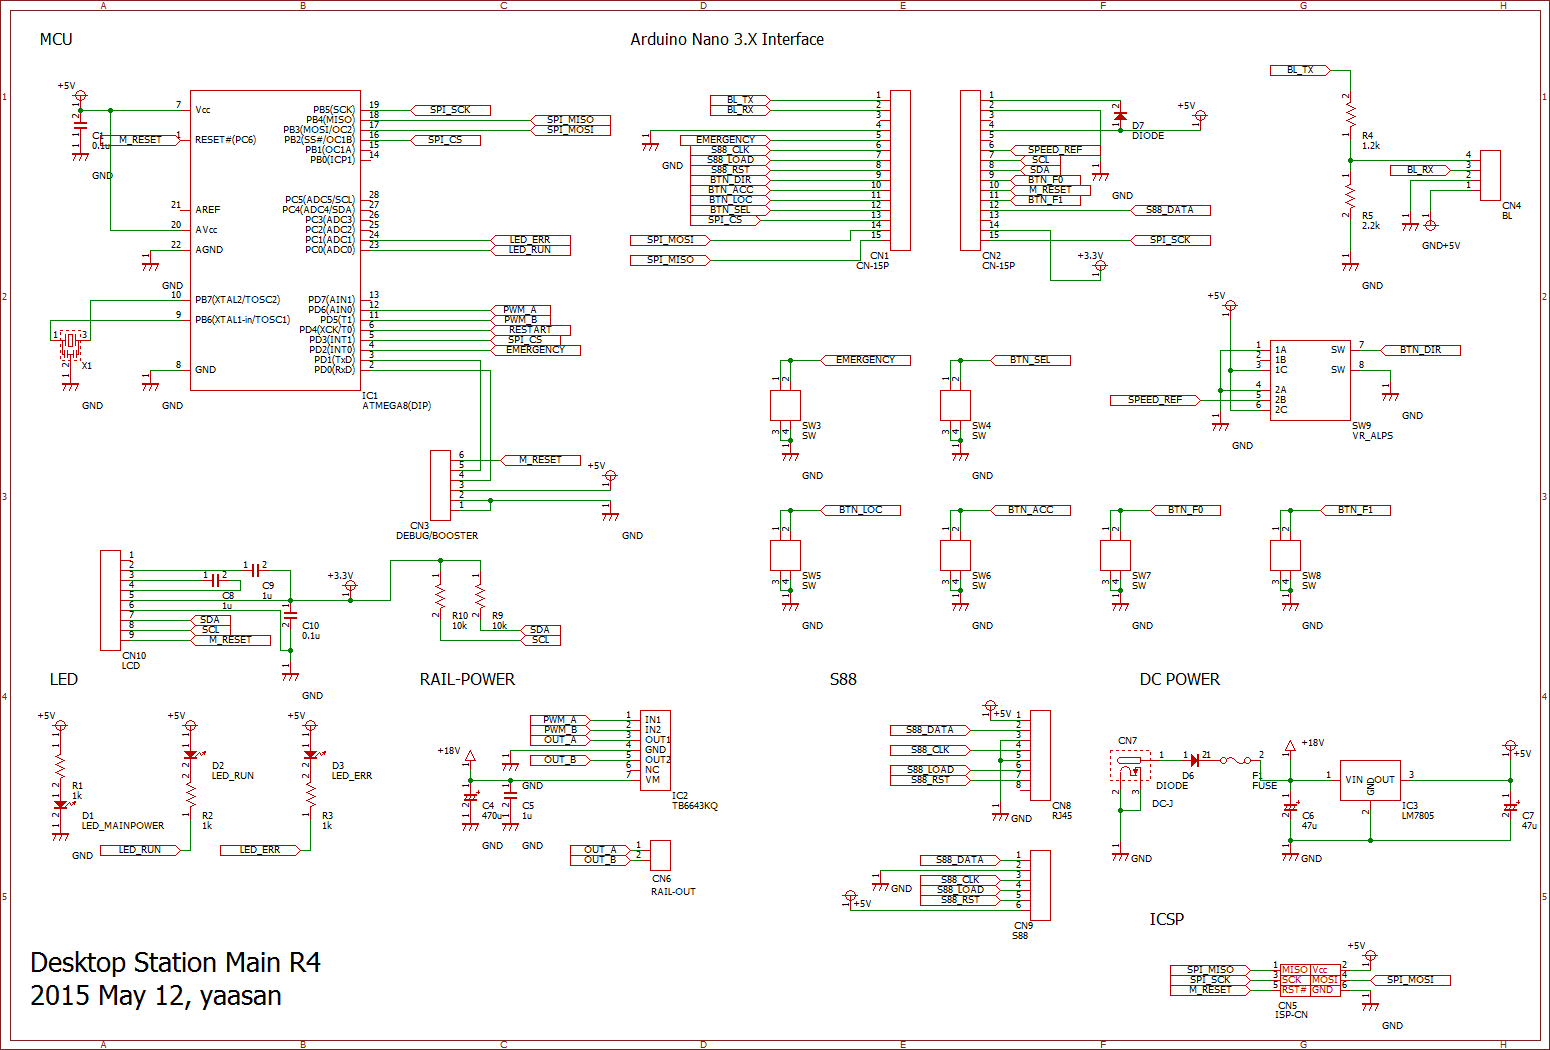
Parts list
| Parts no | Parts name | Notes and specification |
| R1 | resistor | 1kOhm, 3mA(typ),LED current limitation |
| R2 | resistor | 1kOhm, 3mA(typ),LED current limitation |
| R3 | resistor | 1kOhm, 3mA(typ),LED current limitation |
| R4 | resistor | 1.2kOhm |
| R5 | resistor | 2.2kOhm |
| R9 | resistor | 6.8kOhm |
| R10 | resistor | 6.8kOhm |
| C1 | MLCC | 10V, 0.1uF |
| C4 | Capacitor | 35v,220-470uF |
| C5 | MLCC | 50V,1uF |
| C6 | Capacitor | 50v,47uF |
| C7 | Capacitor | 50v,47uF |
| C8 | MLCC | 10V, 1uF |
| C9 | MLCC | 10v, 1uF |
| C10 | MLCC | 10V 0.1uF |
| D1 | LED | yellow |
| D2 | LED | red |
| D3 | LED | green |
| D6 | Diode | SBM1045VSS |
| D7 | Diode | 1N4148 |
| SW3 | Switch | Tackt switch |
| SW4 | Switch | Tackt switch |
| SW5 | Switch | Tackt switch |
| SW6 | Switch | Tackt switch |
| SW7 | Switch | Tackt switch |
| SW8 | Switch | Tackt switch |
| SW9 | VR | Variable resistor with switch |
| CN1 | Pin header | 15pin Header |
| CN2 | Pin header | 15pin Header |
| CN3 | nc | nc |
| CN4 | nc | User option for Bluetooth |
| CN5 | Connector | 2x3pin Long socket header |
| CN6 | Connector | 2pin terminal block |
| CN7 | DC jack | MJ-179P compatible |
| CN8 | S88N RJ45 jack | RJ45 jack |
| CN9 | S88 header | 6pin L connector |
| IC1' | IC Socket | 28pin IC socket |
| IC1 | ATMEGA328 | MCU |
| IC2 | TB6643KQ | Motor driver |
| IC3 | L7805CV | LDO 5V |
| F1 | Resetable fuse | Poly Switch 2.5A or 3.0A |
| X1 | Ceramic resonator | nc |
| LCD | I2C LCD | AQM0802A-RN-GBW 3.3V I2C LCD |
nc means not connected(unused). Not needed to solder the parts.
DS main specification
Please attention the following specification.
Required items
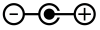 and 2.1mm jack. Please check your model railway specs.
(Marklin, DCC HO) 12V-16V 2A or more. Akizuki 45WSlim DC power supply15V3A LTE(GFP)451DA-1530.
(DCC N, Japanese HO) 12V 1A or more. Akizuki DC power supply 12V2A STD-12020U.
Soldering procedure
The kit requires the soldering experience. You need to understand PCB's displayments.
- Prepare solder, soldering iron, electric parts, PCB etc.
- Solder electric parts.
- After soldered, check the soldering result. Attention short pins.
- Insert ATMEGA to DIP Socket. Attention the direction and silk pattern.
- Insert attached Arduino nano(compatible) board and check.
Capacitors and diodes and LED has a pole. Attention please.
Instruction for DSmain's buttons
Definition of buttons.
START/STOP: Providing power supply to rail. If Run indicator turns off, power is not providing in rail.
LOCO: Locomotive mode. You can use volume dial, F0, F1. If you want to change the address, Press SELECT and LOCO buttons. If you want to determine the edited address, Press LOCO button.
TURNOUT: Accessory mode. F0,F1 buttons are assigned as Straight and Diverse. If you want to change the address, Press SELECT and TURNOUT buttons. If you want to determine the edited address, Press TURNOUT button.
F0(Straight, +): In case of locotmoive mode, F0, F2 (When press SELECT button). In case of accessory mode, Straight. When address editing mode, Increment(+1).
F1(Diverse, -): In case of locotmoive mode, F1, F3 (When press SELECT button). In case of accessory mode, Diverse. When address editing mode, Decrement(-1).
DIR volume:Adjusting locomotive speed. Stuff left side, the direction will change.
How to control lovomtoives
You can control locomotives when LOCO button pressed.
If you want to change the locomtoive address, Press SELECT and LOCO buttons. You can edit locomotive address.
At locomotive address edit mode, you can adjust the address using +(F0) and -(F1) buttons. If press SELECT buttons 2 seconds or more, you can change the protocol which are DCC and Marklin digital (MM2).
After edited the address, press LOCO button. You can determine the address. If press the other buttons as TURNOUT or START/STOP, the address will be canceled.
Volume dial can adjust locomtoive speed.
If volume dial stuffs left side, you can change the direction of locomtoive.
F0 and F1 buttons are assinged locomotive's function. Press LOCO and F0 or F1 buttons, you can control F2 and F3.How to control turnouts
TURNOUTを押すと、ポイントの操作が出来ます。
ポイント操作画面でも、機関車を操作するためのボリュームは操作可能です。
アドレスの変更画面は、SELECTを押しながらTURNOUTを押します。
アドレス変更画面では、+(F0)と-(F1)でアドレスを切り替えできます。SELECTを押しながら、+(F0)と-(F1)で変化量を調整できます。また、SELECTを長押しすると、DCCまたはMarklin digital(MM2)のいずれかのプロトコルを変更できます。
アドレスを変更後、TURNOUTを押すとアドレスを確定できます。LOCOやSTART/STOPを押すと、キャンセルになります。
F0(直進,straight),F1(分岐,diverse)はそのまま押すと、ポイントの分岐方向を制御できます。
CVの書き込み方法
LOCOを長押しすると、CVの書き換え画面になります。
+(F0)と-(F1)でCV値を設定できます。SELECTを押しながら、+(F0)と-(F1)でCV番号を変更できます。
SELECTを押しながらSTART/STOPを押すと、CVを書き込みます。線路への電力供給は自動的にOFFになります。
LOCOまたはTURNOUTを押すと、CV設定画面をキャンセルします。

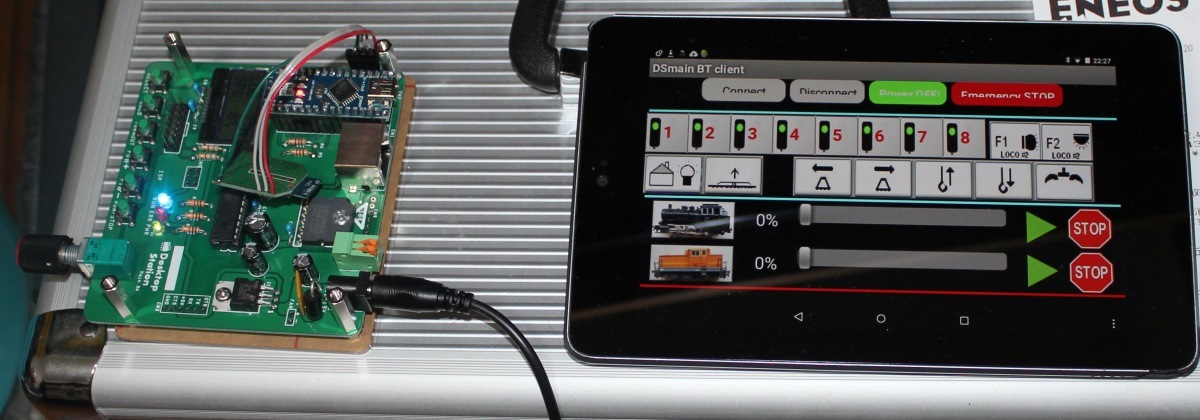
Supporting Bluetooth module
DSmainR4 supports Bluetooth module. CN4 header can connect Bluetooth option board. Bluetooth option board is included in DSmainR4 kit. You can solder microchip's RN42-I/RM to this option board. RN42-I/RM module is not included at DSmainR4 kit. Please order RN42-I/RM module at your country's electronics parts shop. We don't sell this board. In Japan, Akizuki sells RN-42 I/RM Bluetooth module.
Bluetooth function is automatically worked at DSmainR4. You only need to configure PC's bluetooth connection and assignment of serial port.
About cooling fan
DSmain has a FAN connector nearby F1. This connector provide DC power supply to cooling FAN. If you want to supply 3A or more, you need to connect cooling fan.
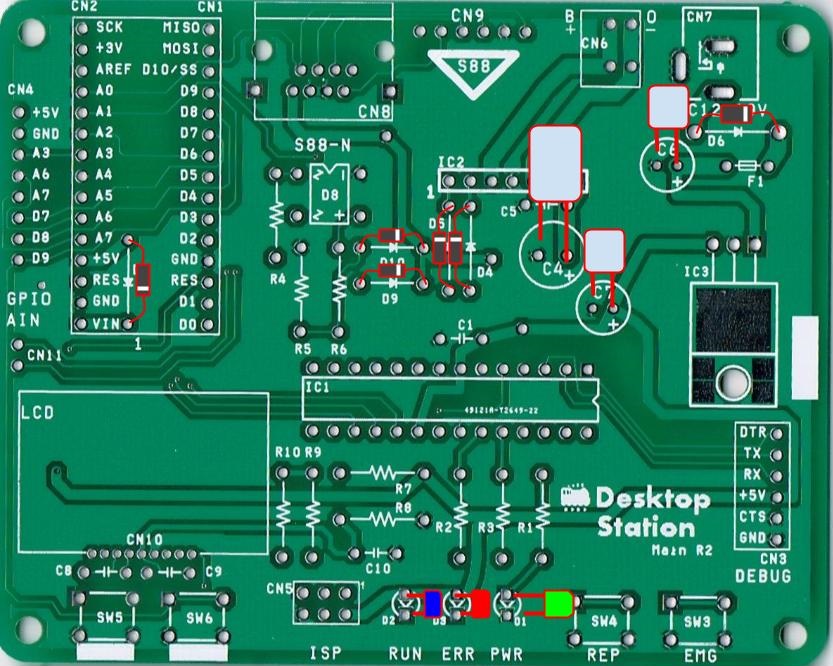
Assignment of buttons and connectors
The following is assignment of buttons and connectors number.

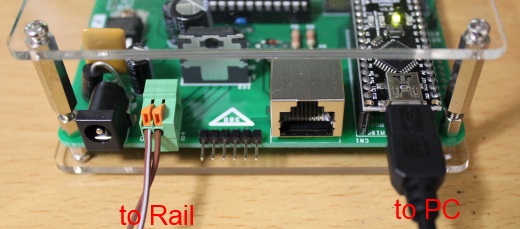
Assembling
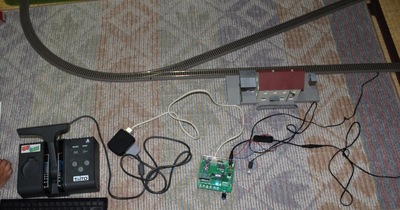
After soldered, assemble Arduino nano compatible board and acryl case. DC power supply connects to DC jack on the DSmain. The connection between PC and DSmain uses USB port of Arduino nano. Connect a USB cable.
Wirign feeder cable
For DCC/DC users:
The poles doesn't care.
For Marklin/AC users:
Ctrack has the pole. The center rail beside is B (red color), the others rail beside is O (brown color).
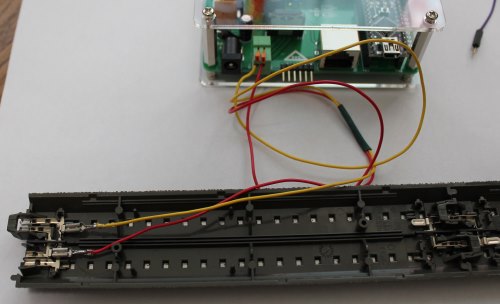
Marklin CTrack (H0 gauge) wiring example.
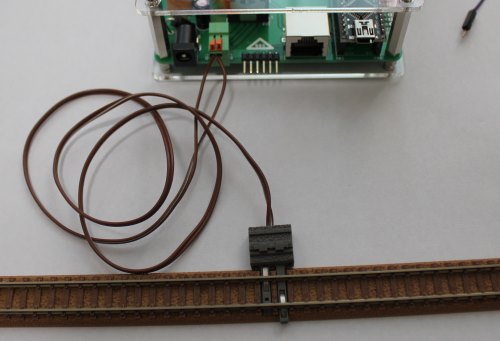
Tomix Fine Track (N gauge) wiring example.
マスコンとの配線
プレイステーション用の電車でGO!向けに販売されていた、マスコンが接続できるオプションを有償で提供しています(自分で材料を買って作ることも可能ですが、一切サポートしません)。詳細はwikiを参照ください。